
Is your Whirlpool clothes dryer showing signs of wear and tear, making unusual noises, or failing to dry clothes efficiently? It may be time for a clothes dryer belt replacement. The belt is a crucial component of the dryer that helps rotate the drum and allows for proper heat distribution. This article will provide you with a comprehensive guide on how to replace the clothes dryer belt in your Whirlpool appliance.
A malfunctioning clothes dryer belt can lead to a variety of issues such as loud thumping noises, failure to start, and uneven drying. These signs indicate that the belt may be worn out or broken, necessitating a replacement. In this guide, we will discuss the various symptoms that signify it is time for a new dryer belt.
Understanding the importance of a functioning dryer belt is essential to grasp the significance of timely replacement. The belt plays a crucial role in ensuring that the drum rotates smoothly and effectively distributes heat throughout the laundry load. Therefore, maintaining a properly functioning belt is vital for efficient drying and overall performance of the appliance.
Before embarking on the actual replacement process, adequate preparation is key to ensuring a smooth and successful outcome. This section will cover all the necessary steps you should take prior to replacing the clothes dryer belt to minimize any potential complications during the procedure.
In order to successfully replace your Whirlpool clothes dryer belt, you will need specific tools and materials. This section will outline all the items required for the task at hand, enabling you to acquire everything necessary beforehand to avoid any interruptions during the replacement process.
Signs That the Clothes Dryer Belt Needs Replacement
There are several indicators that your clothes dryer belt may need to be replaced. One of the most common signs is when you hear a loud, repetitive banging or thumping noise coming from your dryer when it’s in operation. This could mean that the belt has become frayed or worn out, causing it to slap against the drum as it turns.
Another sign is if your dryer drum isn’t spinning at all, despite the motor running. In this case, the belt may have snapped completely.
Additionally, if you notice that your clothes are taking longer than usual to dry or if you find that your dryer is getting excessively hot during a cycle, it could be a sign that the belt is slipping and not rotating the drum effectively. Finally, visible wear and tear on the belt itself such as fraying edges or cracks are also surefire signs that it’s time for a replacement.
It’s important to address these issues promptly as continued use of a damaged belt can not only cause further damage to other components of your dryer but also lead to inefficient drying and increased energy consumption.
In some cases, you may also notice a burning smell when using the dryer which could indicate that the belt has become misaligned and is rubbing against other components. This can be dangerous and should be addressed immediately for safety reasons.
Proper maintenance and regular inspection of your clothes dryer can help in early detection of any issues with the belt, allowing for timely replacement and preventing further damage or safety hazards.
| Signs of Belt Damage | Actions Needed |
|---|---|
| Loud banging or thumping noise | Time for replacement |
| Dryer drum not spinning | Replacement necessary |
| Prolonged drying times/Excessive heat | Indicates slipping; replace promptly |
| Visible wear and tear/cracks on belt | Evidence for immediate replacement |
Understanding the Importance of a Functioning Dryer Belt
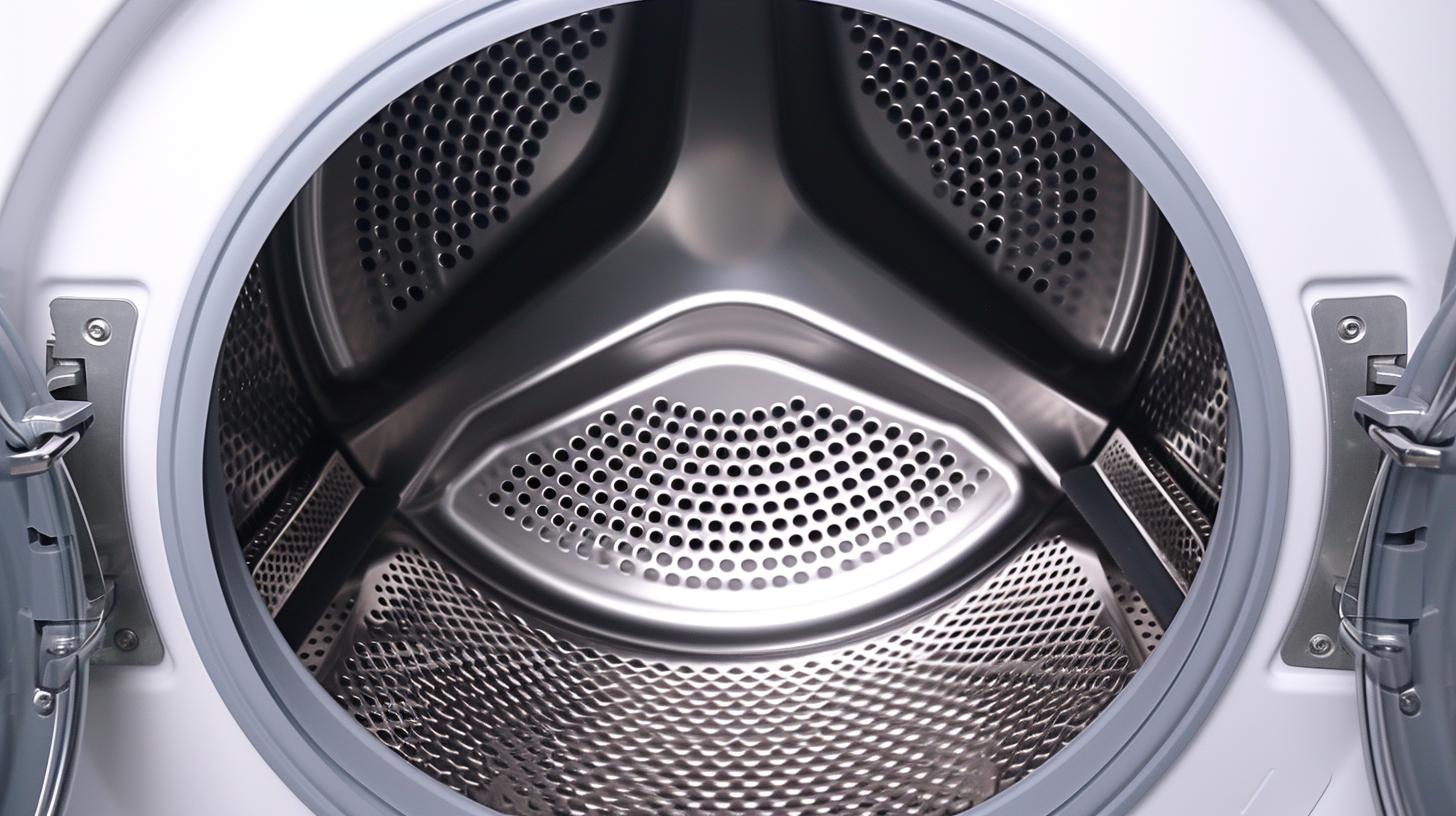
A functioning dryer belt is essential for the proper operation of your Whirlpool clothes dryer. The dryer belt is responsible for turning the drum, allowing the clothes inside to tumble and dry evenly. Without a functioning belt, the drum will not rotate, resulting in damp or completely wet clothes even after a full drying cycle. This section will discuss the importance of a functioning dryer belt and why regular maintenance and timely replacement are crucial.
To understand the importance of a functioning dryer belt, it’s essential to know how it contributes to the overall operation of the clothes dryer. The belt connects the motor to the drum, transferring power from the motor to rotate the drum. As the drum rotates, it agitates the clothes inside, allowing hot air to circulate and effectively dry them. Without a properly functioning belt, this process cannot occur, leaving you with damp or wet clothing.
Regular maintenance and timely replacement of the dryer belt are crucial to ensure that your Whirlpool clothes dryer operates efficiently. Over time, wear and tear can cause the dryer belt to become loose, frayed, or even break entirely. Regular inspection of the belt can help identify any signs of damage early on, allowing for prompt replacement before any further damage occurs.
A malfunctioning dryer belt not only affects the drying efficiency but can also lead to additional wear on other components of the clothes dryer. For example, if the drum is unable to rotate due to a faulty belt, it can cause strain on the motor and other moving parts within the appliance. This added stress can lead to more extensive and costly repairs in the long run.
In addition to ensuring proper drying performance, a functioning dryer belt also contributes to energy efficiency. When all components of your Whirlpool clothes dryer are operating correctly, it consumes less energy to dry your laundry effectively. A worn-out or damaged dryer belt can lead to longer drying times and increased energy consumption.
Regular maintenance and timely replacement of your Whirlpool clothes dryer belt are essential for efficient operation and preventing additional wear on other components of your appliance. Now that we understand why a functioning dryer belt is important let’s move on tprepare for replacing it in our next section.
Steps to Prepare for Clothes Dryer Belt Replacement
Before you start the process of replacing the clothes dryer belt in your Whirlpool dryer, it is important to prepare your working area and gather all the necessary tools and materials. Proper preparation will ensure a smoother and more efficient belt replacement process. Here are the steps to prepare for clothes dryer belt replacement:
1. Unplug the Dryer: Before doing any maintenance or repair work on your dryer, always start by unplugging it from the power source. This step is crucial for safety reasons and will prevent any accidents while you work on the appliance.
2. Clear the Working Area: Once the dryer is unplugged, clear out any obstacles around the dryer that may hinder your access to the back panel where the belt replacement will take place. Clearing out a space around the dryer will give you enough room to maneuver and work comfortably.
3. Move the Dryer: In some cases, you may need to move the dryer away from the wall to gain better access to the back panel. If this is necessary, carefully move the dryer forward, making sure not to damage the flooring or scratch any surfaces.
4. Gather Necessary Tools and Materials: Before starting with the actual replacement process, make sure you have all the required tools and materials at hand. This will save time and reduce frustration during the replacement process.
Tools and materials needed for clothes dryer belt replacement:
By following these steps to prepare for clothes dryer belt replacement, you can ensure that your working area is safe and organized before beginning the actual replacement process. Proper preparation can make a significant difference in how smoothly and effectively you are able to replace your Whirlpool clothes dryer belt.
Tools and Materials Required for Clothes Dryer Belt Replacement
When it comes to replacing the belt in your Whirlpool clothes dryer, having the right tools and materials is crucial to ensure a successful replacement. Before you begin the process of replacing the dryer belt, it’s important to gather all the necessary items to make the job easier and more efficient.
The first item you will need for the clothes dryer belt replacement whirlpool is a new dryer belt that is compatible with your specific Whirlpool model. It’s important to double-check the model number of your dryer to ensure that you purchase the correct replacement belt. You can usually find this information in your appliance’s manual or by searching online using the model number.
In addition to the new dryer belt, you will also need a putty knife or a flat head screwdriver to help pry open the top and front panels of the dryer. A Phillips or flat head screwdriver will be necessary for removing any screws holding the panels in place. You may also need a socket wrench set if your dryer requires it for disassembly.
Other essential tools for clothes dryer belt replacement include work gloves to protect your hands during the process, as well as a vacuum cleaner with a hose attachment to clean out any accumulated lint and debris from inside the dryer while it is disassembled. Additionally, having a flashlight on hand can be helpful for better visibility inside the appliance.
Lastly, it is recommended to have a clean work surface available for organizing and laying out all removed parts during the replacement process. This will allow you to keep track of small components and ensure they are reinstalled correctly after replacing the dryer belt.
By gathering all these necessary tools and materials before starting the clothes dryer belt replacement, you can streamline the process and minimize any potential delays or challenges that may arise during the repair. With everything prepared, you’ll be ready to move on to step-by-step guide outlined in this article for successfully replacing your Whirlpool clothes dryer belt.
Step-by-Step Guide to Replacing the Clothes Dryer Belt
Replacing the clothes dryer belt on your Whirlpool appliance is a task that can be done at home with the right tools and a little bit of know-how. Here, we will provide you with a step-by-step guide to help you successfully replace the clothes dryer belt and get your dryer running smoothly again.
The first step in replacing the clothes dryer belt is to unplug the dryer from the power source. This is essential for safety reasons as you will be working with electrical components in the process. Once the dryer is unplugged, you can move on to accessing the dryer belt. This may involve removing the dryer’s top panel, front panel, or rear access panel depending on your specific Whirlpool model.
Once you have accessed the dryer belt, take note of how it is routed around the pulleys and other components. This will make it easier for you when installing the new belt. Next, release the tension on the old belt by moving the idler pulley or motor pulley away from the belt. You can then remove the old belt from the dryer drum and other components.
Before installing a new clothes dryer belt, it’s important to ensure that it is compatible with your specific Whirlpool model. Measure its length and width to make sure it matches your old belt or refer to your appliance’s manual for guidance. Once you have confirmed that you have the right replacement belt, carefully loop it around the drum and other components according to how you noted it was routed before.
After installing the new clothes dryer belt, take some time to ensure that everything looks properly aligned and installed. Rotate the drum by hand a few times to check if there are any issues with alignment or tension. Once everything looks good, reassemble any panels that were removed earlier in order to access and replace the old belt. Finally, plug in your Whirlpool appliance and test out its new clothes dryer belt by running a brief cycle.
Following these step-by-step instructions should help you successfully replace your Whirlpool clothes dryer belt at home without any hassle. However, if you encounter any issues during this process or are unsure about anything, do not hesitate to seek professional assistance for safety reasons as well as ensuring proper installation of your new clothes dyer belt.
Tips and Tricks for a Successful Clothes Dryer Belt Replacement
Use the Right Tools and Materials
When replacing a clothes dryer belt, it is crucial to use the right tools and materials to ensure a successful installation. Some of the essential tools you will need include a putty knife, screwdriver, and a nut driver. Additionally, you will need a new belt specifically designed for your Whirlpool dryer model. Using the correct tools and materials will make the process much smoother and prevent any complications during the replacement.
Clean and Inspect Other Components
Before installing the new dryer belt, it is advisable to clean and inspect other components of the dryer. This includes cleaning out any built-up lint or debris from the drum and exhaust vent. Additionally, check the idler pulley and drum support rollers for any signs of wear or damage. Addressing these issues before replacing the belt can prevent future problems with your dryer.
Refer to the Manufacturer’s Instructions
During the replacement process, it is important to refer to the manufacturer’s instructions that came with your Whirlpool dryer. These instructions provide specific guidance on how to access and replace the belt in your particular model. Following these guidelines will ensure that you are performing the replacement correctly and safely.
Check for Proper Alignment
After installing the new dryer belt, double-check that it is properly aligned on the drum and motor pulley. Improper alignment can cause premature wear on the belt and lead to potential issues with your dryer’s performance later on.
Test Run Your Dryer
Once you have completed the replacement process, do a test run of your dryer to ensure that everything is functioning properly. Listen for any unusual noises or vibrations that could indicate an issue with the new belt installation.
By following these tips and tricks, you can ensure a successful clothes dryer belt replacement for your Whirlpool appliance. Taking care to use proper tools, inspect other components, follow manufacturer instructions, check for proper alignment, and test run your dryer will help extend the life of your new belt and keep your dryer running smoothly for years to come.
Common Mistakes to Avoid During Clothes Dryer Belt Replacement
When replacing the belt on your Whirlpool clothes dryer, it is important to be aware of common mistakes to avoid in order to ensure a successful and seamless replacement process. Making these mistakes can lead to further damage to your dryer or result in the replacement belt not functioning properly. Here are some common mistakes to avoid during clothes dryer belt replacement.
Not Unplugging the Dryer
One of the most crucial steps that homeowners often forget when replacing a dryer belt is to unplug the appliance from the power source. Failing to do so can be extremely dangerous and may result in electric shock or injury. Always remember to disconnect your Whirlpool clothes dryer from the power supply before starting the replacement process.
Skipping Proper Preparation
Another mistake that people commonly make is skipping the preparation steps before replacing the dryer belt. It is important to thoroughly clean and clear out any lint or debris from inside the dryer before beginning work on replacing the belt. This will help ensure a smoother process and prevent any potential issues once the new belt is installed.
Incorrect Installation of Belt
Improper installation of the new dryer belt is another mistake that many individuals make during this process. It is essential to carefully follow the manufacturer’s instructions and diagrams to correctly position and secure the new belt in place. Failure to do so could lead to inefficiency or malfunction of the new belt, causing it to wear out prematurely.
Forgetting Routine Maintenance
After installing a new dryer belt, it is important not to forget about routine maintenance and care for your Whirlpool clothes dryer. This includes checking for proper tension, cleaning out lint regularly, and ensuring all components are working as they should be. Neglecting these maintenance tasks can lead to premature wearing out of the new belt and other parts of your dryer.
Rushing the Process
Finally, one common mistake that many homeowners make when replacing a dryer belt is rushing through the process. It’s crucial to take your time, follow each step carefully, and ensure everything is done correctly. Rushing through any part of this process can result in errors that could potentially cause damage or malfunction down the line.
By being aware of these common mistakes and taking precautionary measures throughout each step of the clothes dryer belt replacement process, you can successfully replace your Whirlpool clothes dryer belt without encountering any major issues.
Testing the New Clothes Dryer Belt and Ensuring Proper Installation
After successfully replacing the clothes dryer belt, it is crucial to test the new belt and ensure proper installation to guarantee that your dryer functions optimally. This final step is essential in completing the replacement process and ensuring that your dryer runs smoothly without any issues.
To begin testing the new clothes dryer belt, start by carefully rotating the drum by hand. The drum should rotate smoothly without any resistance or strange noises. If you notice any unusual sounds or difficulty in rotating the drum, it may indicate that the belt has not been installed correctly or that there are other underlying issues with the dryer.
Next, close the dryer door and set the dryer to a regular drying cycle. Observe if the drum rotates normally and if there are any unusual noises during operation. It is important to stay nearby while the dryer is running to keep an eye out for any irregularities that may indicate a problem with the newly replaced belt.
Another key aspect of testing the new clothes dryer belt is to ensure that it operates quietly and does not produce any squeaking, squealing, or grinding noises during operation. These noises can be a sign of improper installation or tension issues with the belt, which need to be addressed promptly before they lead to further damage.
Lastly, check for any potential issues such as overheating or burning smells while the dryer is in operation. These could indicate friction or rubbing caused by a misaligned or improperly installed belt, which can lead to more significant problems if not resolved immediately.
By thoroughly testing the new clothes dryer belt and ensuring its proper installation, you can be confident in your ability to replace and maintain your Whirlpool clothes dryer without encountering any functionality issues related to the drying system.
Remember that understanding how your specific Whirlpool model works will aid you in effectively diagnosing and addressing potential problems promptly. Finally, performing routine maintenance on all components of your dryer will help extend its lifespan and save you from costly repairs in the future.
Maintenance and Care Tips to Extend the Life of the New Clothes Dryer Belt
In conclusion, replacing a clothes dryer belt for a Whirlpool dryer is a manageable task that can save you time and money in the long run. By identifying the signs that your dryer belt needs replacement and understanding its importance in the functioning of the appliance, you can prevent potential issues and keep your dryer working efficiently.
Once you have successfully replaced the dryer belt, it’s important to maintain and care for it properly to extend its lifespan. One important maintenance tip is to regularly clean the lint trap and exhaust vent to prevent lint buildup, which can strain the new belt. Additionally, be sure to clean the drum and interior of the dryer to avoid any debris that could cause unnecessary wear on the belt.
Another crucial aspect of caring for your new clothes dryer belt is to avoid overloading the appliance with heavy or excessive laundry loads. Overloading can put strain on the belt and other components of the dryer, leading to premature wear and tear.
Regular inspection of your Whirlpool clothes dryer belt is also key in ensuring its longevity. Keep an eye out for any signs of wear or damage, such as fraying or cracking, and promptly replace the belt if necessary. This proactive approach can help prevent unexpected breakdowns and costly repairs.
Furthermore, consider scheduling routine maintenance checks with a professional technician to ensure that your Whirlpool clothes dryer is in optimal condition. A trained expert can provide valuable insights into how well your appliance is functioning and catch any potential issues before they escalate.
By following these maintenance and care tips, you can extend the life of your new clothes dryer belt and keep your Whirlpool dryer running smoothly for years to come. Proper maintenance not only saves you from inconvenient breakdowns but also helps you get the most out of your investment in a reliable home appliance.