
Is your Whirlpool dryer not heating up properly? One possible cause could be a faulty heating element. In this article, we will discuss how to replace the heating element in a Whirlpool dryer, providing you with a step-by-step guide to effectively solve this issue.
Whirlpool dryers are known for their reliability and efficiency in drying clothes quickly and effectively. However, over time, the heating element in these dryers may wear out or become defective, resulting in inadequate heat production. Understanding the signs of a faulty heating element is crucial in identifying when it’s time for a replacement.
Before delving into the replacement process, it’s important to recognize the warning signs that indicate a malfunctioning heating element. Then, we will cover essential safety precautions and the tools needed for a successful replacement to ensure a smooth and safe DIY experience.
Following that, we will provide a detailed step-by-step guide on how to disassemble the dryer and identify and remove the old heating element. Furthermore, we will cover tips on choosing the right replacement heating element for your specific Whirlpool dryer model so you can select one that best fits your needs.
Additionally, our guide will walk you through the installation of the new heating element as well as reassembling the dryer. We will also address troubleshooting common issues that may arise during the replacement process and offer tips on maintaining your Whirlpool dryer’s heating element to extend its lifespan.
Understanding the Signs of a Faulty Heating Element
If you suspect that your Whirlpool dryer is not producing enough heat, it could be due to a faulty heating element. Understanding the signs of a faulty heating element is crucial in order to address the issue as soon as possible.
One of the most common signs is if your clothes are not drying properly, even after a full drying cycle. If you notice that your dryer is taking longer than usual to dry clothes, it’s likely that there’s a problem with the heating element.
Another sign of a faulty heating element is if your dryer is producing no heat at all. This can be easily noticeable by checking if the air inside the dryer remains cool throughout the entire drying cycle. Also, if you notice any visible damage or breakage on the heating element itself, it’s a clear indication that it needs to be replaced.
In addition, strange noises coming from the dryer during operation can also indicate a problem with the heating element. Any rattling, buzzing, or humming sounds should prompt you to inspect the heating element for any issues.
It’s important to address these signs promptly in order to avoid further damage to your dryer and ensure efficient performance. Knowing how to replace a faulty heating element in your Whirlpool dryer will not only save you money on professional repairs, but also help maintain the functionality of your appliance for years to come.
| Signs of a Faulty Heating Element | Description |
|---|---|
| Clothes not drying properly | If clothes remain damp after a full drying cycle |
| No heat production | If the air inside the dryer remains cool throughout drying cycle |
| Visible damage or breakage | If there are any visible signs of damage on the heating element. |
Safety Precautions and Tools Needed for Replacement
Replacing a heating element in a Whirlpool dryer is not only a cost-effective solution, but it can also extend the life of your appliance. However, before you begin the replacement process, it’s important to prioritize safety and ensure that you have the necessary tools for the job.
Safety Precautions:
When working with any electrical appliance, safety should always be your top priority. Before starting the replacement process, it’s crucial to unplug the dryer from the power source to avoid any risk of electric shock. Additionally, wearing protective gloves and safety goggles can help prevent injury while handling sharp edges or small components.
Tools Needed:
In order to successfully replace the heating element in your Whirlpool dryer, you will need a few essential tools. These may include:
- Screwdriver set (Phillips and flathead)
- Nut driver
- Multimeter (for testing electrical components)
- Work gloves
- Safety goggles
- Replacement heating element (make sure to choose the right one for your specific Whirlpool dryer model)
It’s important to gather all necessary tools and equipment before beginning the replacement process to ensure a smooth and efficient experience.
Remember that safety should always come first when performing any maintenance on electrical appliances. Taking the time to gather the proper tools and prioritize safety measures will make replacing the heating element in your Whirlpool dryer a seamless process.
Now that we’ve covered important safety precautions and identified the tools needed for replacing a heating element in a Whirlpool dryer, let’s move on to the next steps in this step-by-step guide: disassembling the dryer and identifying the old heating element for removal.
Step-by-Step Guide to Disassembling the Dryer
Disassembling a Whirlpool dryer to replace the heating element may seem like a daunting task, but with the right tools and guidance, it can be a manageable DIY project. In this section, we will provide you with a step-by-step guide to safely and effectively disassemble your dryer in order to access and replace the faulty heating element.
Gather Your Tools and Prepare the Workspace
Before beginning the disassembly process, it is important to ensure that you have all the necessary tools on hand. These may include a screwdriver (both Phillips and flat-head), pliers, a putty knife, and a multimeter for electrical testing. Additionally, it is crucial to unplug the dryer from its power source before starting any work.
Remove the Dryer Top and Front Panel
Start by locating and removing the screws securing the dryer’s top panel to the cabinet. Once these screws are removed, carefully lift up on the panel and set it aside. Next, open the dryer door and locate the screws securing the front panel to the cabinet. After removing these screws, tilt the front panel forward and disconnect any wiring harnesses that may be attached before fully removing it from the cabinet.
Take Out the Drum
With the front panel removed, you will have access to remove or support the drum as needed in order to access and replace the heating element. Take note of how any belt tension or support mechanisms are configured before disconnecting them in order to remove the drum from inside of the cabinet.
Accessing and Removing Other Components
Once you have removed or supported the drum, you may need to take out additional components such as thermal fuses or thermostats in order to gain access to where the heating element is located within your specific model of Whirlpool dryer. Be sure to refer to your dryer’s manual for guidance on accessing these components.
By following this step-by-step guide carefully and taking necessary safety precautions along each stage of disassembly process, you can effectively access and replace a faulty heating element in your Whirlpool dryer without needing to enlist professional help. Remember that proper maintenance of your appliances can enhance their lifespan while also ensuring safe operation for years to come how to replace heating element in whirlpool dryer.
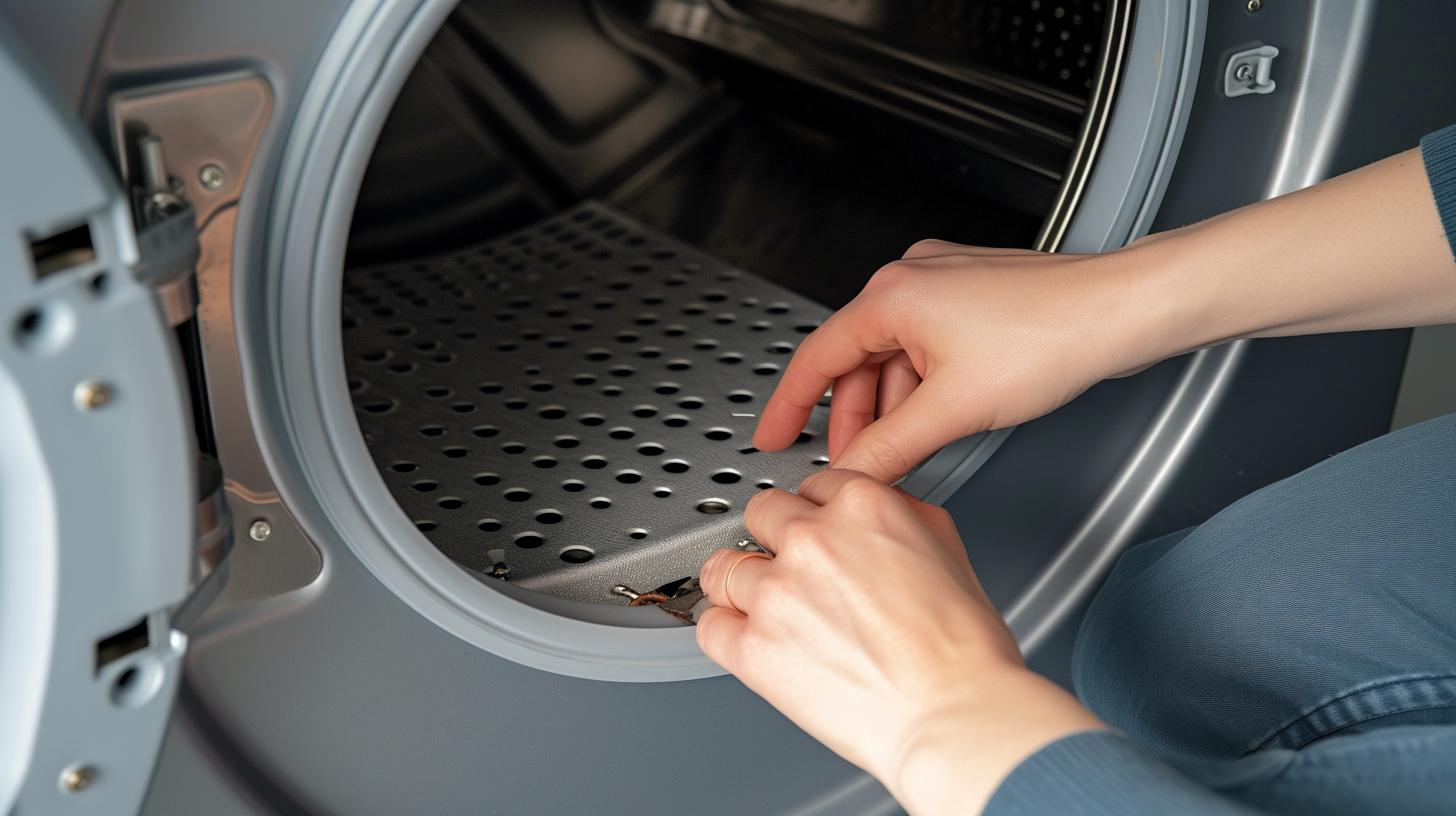
Identifying and Removing the Old Heating Element
When it comes to troubleshooting and repairing your Whirlpool dryer’s heating element, identifying and removing the old one is a crucial step in the process. Before starting this task, it’s important to ensure that the dryer is unplugged to avoid any electrical accidents.
To begin, you will need to remove the back panel of the dryer to gain access to the heating element. Once the panel is removed, locate the heating element which is typically found at the bottom of the dryer. Take note of how the old heating element is positioned and connected as this will be helpful when installing the new one.
Next, use a screwdriver to disconnect the wires that are connected to the heating element. It’s recommended to take a picture of the wiring or make a note of where each wire is connected for easy reference later on. Once all wires are disconnected, carefully remove any screws or bolts that are securing the heating element in place.
After removing any fasteners, gently pull out the old heating element from its housing. Be mindful of any sharp edges and take care not to damage other components within the dryer during this process.
As you remove the old heating element, inspect it for any visible signs of damage such as corrosion or breaks in the coil. These issues are common causes of a malfunctioning heating element and may indicate why it needs replacement. Dispose of the old heating element responsibly according to local regulations for electronic waste.
Remember that if you feel unsure about performing this task on your own, seeking professional assistance can ensure that your Whirlpool dryer’s heating element is replaced correctly.
| Task | Tools Needed |
|---|---|
| Remove back panel | Screwdriver |
| Disconnect wires | Screwdriver/pliers |
| Remove fasteners | Screwdriver/wrench |
Choosing the Right Replacement Heating Element for Your Whirlpool Dryer
When it comes to choosing the right replacement heating element for your Whirlpool dryer, there are a few important factors to consider. The heating element is a crucial component of the dryer, responsible for generating the heat needed to dry your clothes effectively. The first step in choosing a replacement heating element is to ensure that it is compatible with your specific Whirlpool dryer model.
Before purchasing a new heating element, you will need to take note of your Whirlpool dryer’s model number and serial number. This information can usually be found on a metal plate located inside the dryer door or on the back of the appliance. Once you have this information, you can use it to search for the correct replacement part. It is important to verify that the replacement part is specifically designed for use with your exact Whirlpool dryer model.
Another important consideration when choosing a replacement heating element is the type of heating element required for your particular Whirlpool dryer model. There are different types of heating elements used in dryers, including coil-style and flat-style elements. It is essential to select the correct type of heating element to ensure proper fit and function within your dryer.
Additionally, you should also check for any warranty or guarantee offered with the replacement heating element. Many manufacturers offer warranties on their parts, so be sure to review this information before making a purchase. This can provide added peace of mind knowing that you are covered in case of any issues with the replacement part.
Lastly, researching customer reviews and ratings for different replacement heating elements can also be helpful in making an informed decision. Look for feedback from other Whirlpool dryer owners who have replaced their heating elements to get an idea of which brands or specific products are highly recommended.
Ensuring that you choose the right replacement heating element for your Whirlpool dryer is essential for a successful repair process and long-term functionality of your appliance.
| Consideration | Action |
|---|---|
| Verify Dryer Model Number | Take note of model number and serial number |
| Heating Element Type | Select correct type – coil-style or flat-style |
| Warranty/Guarantee | Check if there’s any warranty offered |
| Customer Reviews |
Installing the New Heating Element
After safely removing the old heating element from your Whirlpool dryer, it is now time to install the new one. This step is crucial in ensuring that your dryer will continue to function efficiently and effectively in providing you with properly dried clothes.
Step 1: Placing the New Heating Element
Carefully position the new heating element in the same location as the old one. Make sure to align it correctly and secure it in place before proceeding to reassemble the dryer.
Connecting Wires
Once the new heating element is securely in place, reconnect any wires or terminals that were disconnected during removal. It is important to ensure that all connections are tight and secure to prevent any electrical issues once the dryer is plugged back in.
Reassembling the Dryer
After securing the new heating element and reconnecting any wires, carefully put back together all the components of the dryer that were removed during disassembly. Refer to your photos or notes from earlier steps to ensure everything is put back together correctly.
Remember that reassembling your dryer requires attention to detail and taking your time. Rushing through this step could lead to mistakes or missed connections, resulting in more problems down the line.
Testing the New Heating Element
Before using your Whirlpool dryer again, it’s essential to test the new heating element to ensure it is functioning properly. Turn on the dryer and wait for a few minutes while closely monitoring if there are any signs of overheating or malfunction.
By following these steps carefully, you can successfully install a new heating element in your Whirlpool dryer and enjoy its efficient performance once again. If you encounter any issues during this process, refer to troubleshooting tips or seek professional help if needed.
Reassembling the Dryer and Testing the New Heating Element
Now that you have successfully installed the new heating element in your Whirlpool dryer, it’s time to reassemble the appliance and test the new component. Follow these step-by-step instructions to ensure that everything is put back together properly and that the new heating element is functioning correctly.
First, begin by carefully placing the front panel of the dryer back into position and securing it with the screws or clips that were removed during disassembly. Make sure that all of the wires and connectors are properly reattached and secured in place before proceeding.
Next, reattach the bulkhead or drum support at the front of the dryer. Use a screwdriver to tighten any screws or bolts that hold this component in place. Be sure to check for any loose or missing screws from other parts of the dryer as well.
Once the front panel and bulkhead are securely reattached, carefully slide the drum back into place inside the dryer. Make sure it sits on its support rollers or glides correctly. Then, reattach any components such as drum belts or pulleys according to your specific model’s design.
After reassembling the interior components of your Whirlpool dryer, it’s time to reconnect the electrical power and test the new heating element. Plug in your dryer or turn on its circuit breaker, then set it for a regular drying cycle. Allow the appliance to run for a few minutes to ensure that heat is being produced by the new heating element.
If everything appears to be working properly, you can finish reassembling any remaining exterior panels or covers on your Whirlpool dryer. Double-check that all screws, bolts, and clips are secured tightly before running another test cycle on your appliance.
By following these steps for reassembling and testing a new heating element in your Whirlpool dryer, you can ensure safe and efficient operation of your appliance once again. If you encounter any issues during this process, refer to troubleshooting tips provided earlier in this guide on how to replace a heating element in a Whirlpool dryer.
Troubleshooting Common Issues During Replacement
Lack of Heat Output
If after replacing the heating element, you still experience a lack of heat output from your Whirlpool dryer, there may be other underlying issues. First, ensure that the power supply to the unit is on and properly connected. Check for any blown fuses or tripped circuit breakers that may be preventing electricity from reaching the dryer. Additionally, inspect the thermal fuse and thermostat for any signs of damage or malfunction.
Overheating
On the flip side, if your dryer is now producing excessive heat after replacing the heating element, it could be due to a faulty thermostat or thermistor. These components are responsible for regulating the temperature inside the dryer, and if they are not functioning properly, it can lead to overheating. Carefully inspect these parts and replace them if necessary.
Strange Noises
During the replacement process, you may encounter strange noises coming from your Whirlpool dryer. This could be an indication of a misaligned or loose part within the machine. Check all components that were removed and reinstalled during the replacement process to ensure they are properly secured in place. Additionally, inspect the drum support rollers and idler pulley for any wear or damage that may be causing unusual sounds.
Electrical Issues
If you encounter electrical issues such as sparking or arcing after replacing the heating element, immediately disconnect power to the dryer and examine all electrical connections for signs of damage or improper installation. Make sure all wires are securely connected to their respective terminals and that there are no frayed wires present.
Gas Dryer Conversion
It’s important to note that this troubleshooting guide specifically applies to electric Whirlpool dryers with a heating element. If you have a gas dryer model that requires a heating source like a gas valve solenoid set rather than an electric heating element,replacement procedures will differ siginificantlyand may require professional assistance.
By following these troubleshooting tips, you can better understand how to identify and address common issues that may arise during the process of replacing a heating element in your Whirlpool dryer. Always prioritize safety when dealing with electrical appliances and consult professional help when needed to ensure proper maintenance and repair of your dryer’s heating system.
Tips for Maintaining Your Whirlpool Dryer’s Heating Element
Maintaining your Whirlpool dryer’s heating element is crucial to ensure that it continues to function effectively and efficiently. By performing regular maintenance, you can extend the lifespan of the heating element and prevent any potential issues that may arise. Here are some tips to help you maintain your Whirlpool dryer’s heating element:
1. Clean the lint trap regularly: One of the most important maintenance tasks for your dryer is to clean the lint trap after every use. A clogged lint trap can restrict airflow, causing the heating element to overheat and potentially fail. Use a brush or vacuum attachment to remove any built-up lint from the trap.
2. Check the venting system: Inspect the venting system of your dryer for any blockages or restrictions. A clear venting system ensures proper airflow, which is essential for the heating element to function efficiently. Remove any lint or debris from the vent and ensure that it is not kinked or bent.
3. Inspect the heating element for signs of damage: Periodically check the heating element for any visible signs of damage such as fraying wires, discoloration, or corrosion. If you notice any issues, it may be time to consider replacing the heating element.
4. Avoid overloading the dryer: Overloading your dryer can put excessive strain on the heating element and other components. To prevent unnecessary wear and tear, follow the manufacturer’s guidelines for load capacity and avoid stuffing too many items into the dryer at once.
5. Schedule professional maintenance: In addition to performing regular maintenance tasks yourself, scheduling a professional inspection and cleaning of your Whirlpool dryer is advisable. A trained technician can identify any potential issues with the heating element or other components and provide proper maintenance as needed.
By following these tips for maintaining your Whirlpool dryer’s heating element, you can ensure that it operates smoothly and efficiently for years to come.
Conclusion and Final Thoughts
In conclusion, knowing how to replace the heating element in your Whirlpool dryer can save you time and money in the long run. By understanding the signs of a faulty heating element and following safety precautions, you can successfully replace it without having to call a professional.
It is important to remember that when working with electrical appliances, safety should always be a top priority. Always unplug the dryer before beginning any repair work and use the appropriate tools to avoid accidents.
Choosing the right replacement heating element for your specific Whirlpool dryer model is crucial for ensuring optimal performance. Take note of the part number and specifications to ensure compatibility.
After installing the new heating element, it is essential to reassemble the dryer carefully and test the new part before regular use. This will help identify any issues or problems that may arise during installation.
Lastly, maintaining your Whirlpool dryer’s heating element is key to prolonging its lifespan. Regular cleaning and inspection can help prevent major issues from occurring and extend the life of your appliance.
By following these steps and tips, you can successfully replace the heating element in your Whirlpool dryer and keep it running efficiently for years to come.