
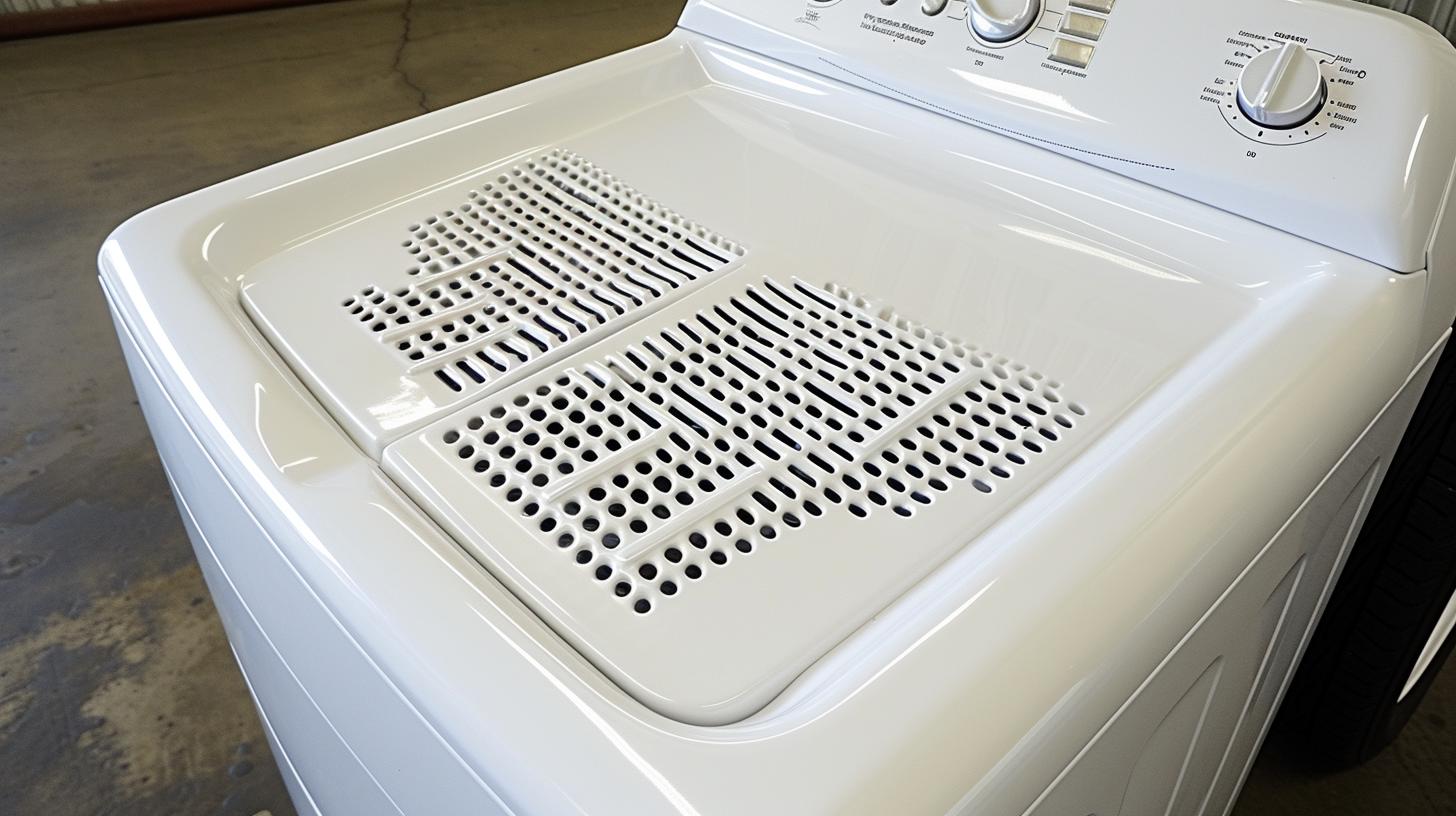
Is your Whirlpool dryer not tumbling or making strange noises? It might be time to replace the belt. In this article, we will guide you through the process of replacing a belt on a Whirlpool dryer, ensuring that your appliance can continue efficiently drying your clothes. We will discuss the importance of a working dryer belt, signs that indicate it needs replacing, the tools and safety precautions required, and provide a step-by-step guide for the replacement process.
A functioning dryer belt is essential for the operation of your Whirlpool dryer. It is responsible for rotating the drum, allowing hot air to circulate and dry your clothes effectively. Over time, wear and tear can cause the belt to stretch or break, leading to issues with the appliance’s performance. By understanding how to recognize when it needs replacing and following our guide, you can ensure that your dryer continues to work efficiently.
Signs such as a loud banging or thumping noise coming from the dryer, clothes taking longer to dry, or the drum not turning at all are indicators that the belt may need replacing. Paying attention to these signs can help prevent any further damage to your appliance and keep it in good working condition.
Before beginning the replacement process, you will need to gather necessary tools and equipment such as a putty knife, screwdriver, nut driver, and of course a replacement belt suitable for your Whirlpool dryer model. Additionally, it is important to take safety precautions before starting any repairs on electrical appliances. This includes unplugging the dryer from its power source and using protective gear such as gloves and safety glasses.
Signs That the Belt on Your Whirlpool Dryer Needs to Be Replaced
As a crucial component of your Whirlpool dryer, the belt plays a vital role in ensuring that your appliance functions properly. Over time, however, the belt may become worn out or damaged, leading to issues with drying performance. It’s important to be aware of the warning signs that indicate it may be time to replace the belt on your Whirlpool dryer.
One of the most common signs that the belt needs to be replaced is a loud and persistent squeaking or squealing noise coming from the dryer during operation. This is often caused by a worn-out or frayed belt that is struggling to maintain its grip on the drum. Additionally, if you notice that your dryer drum is not rotating or tumbling as it should, this could also be a clear indication of a faulty belt.
Another sign that your Whirlpool dryer belt needs replacing is if you find that your clothes are taking longer than usual to dry, even after cleaning the lint trap and ensuring proper ventilation. A worn-out belt can lead to decreased rotation of the drum, resulting in inefficient drying performance.
Furthermore, visible wear and tear on the belt itself is a definite sign that it needs to be replaced. Inspect the belt for any cracks, fraying, or stretching, as these are all indicators that it has reached the end of its lifespan and should be swapped out for a new one.
If you experience any of these warning signs with your Whirlpool dryer, it is essential to address them promptly by replacing the worn-out belt. Doing so will not only restore optimal performance to your dryer but also prevent further damage to other components in the long run.
In the following sections, we will guide you through the process of gathering necessary tools and equipment for replacing a belt on a Whirlpool dryer and provide step-by-step instructions for completing this maintenance task effectively and safely.
Gathering the Necessary Tools and Equipment for the Replacement Process
To successfully replace the belt on your Whirlpool dryer, it is essential to gather the necessary tools and equipment beforehand. Having the right tools will make the replacement process much more efficient and ensure that everything is completed correctly. Here are the tools and equipment you will need:
1. Replacement Belt: The first and most important item you will need is a replacement belt specifically designed for your Whirlpool dryer model. It is crucial to ensure that you have the correct belt to avoid any issues during installation.
2. Screwdriver Set: A set of screwdrivers, including both flathead and Phillips head screwdrivers, will be necessary for removing panels and accessing the internal components of the dryer.
3. Putty Knife: A putty knife or a similar flat tool is useful for prying open clips or securing tabs without causing damage to the dryer’s exterior.
4. Work Gloves: It is essential to protect your hands during the replacement process, especially when handling sharp metal edges or moving parts within the dryer.
5. Safety Goggles: To protect your eyes from dust and debris, it is recommended to wear safety goggles while working on your Whirlpool dryer.
6. Owner’s Manual: Keep your owner’s manual handy for reference throughout the replacement process. It may contain specific instructions or diagrams related to replacing the belt on your particular dryer model.
7. Vacuum Cleaner: Since dryer belts can deteriorate over time, there may be a buildup of lint or debris inside the dryer cabinet. Using a vacuum cleaner with an attachment can help clean out any accumulated dust before beginning the replacement process.
8. Clean Cloth: Having a clean cloth on hand can be useful for wiping down any surfaces inside the dryer cabinet that may have collected dust or debris.
By ensuring that you have all of these tools and equipment ready before starting the replacement process, you can minimize interruptions and complete the task efficiently and safely. Once everything is in place, you will be prepared to move on to taking safety precautions before starting the replacement procedure.

Safety Precautions to Take Before Starting the Replacement
When replacing a belt on a Whirlpool dryer, it is essential to prioritize safety to avoid any potential accidents or injuries. Here are some important safety precautions to take before beginning the replacement process:
1. Unplug the dryer: Before performing any maintenance or repairs on your Whirlpool dryer, always disconnect the power supply by unplugging the appliance from the electrical outlet. This will prevent any risk of electric shock during the replacement.
2. Turn off the gas supply (if applicable): If your Whirlpool dryer is gas-powered, make sure to turn off the gas supply before starting the belt replacement process. This will minimize the risk of gas leaks or other potential hazards.
3. Wear protective gear: When working on your dryer, it’s important to wear appropriate protective gear such as gloves and safety goggles to protect yourself from sharp edges, moving parts, and debris.
4. Use proper tools: Ensure that you have the necessary tools for the replacement process, including a screwdriver, a putty knife, and possibly a nut driver or socket wrench set. Using improper tools can not only make the job more difficult but can also increase the risk of accidents.
5. Work in a well-ventilated area: Dryers can accumulate lint and dust over time, so it’s important to work in a well-ventilated area to avoid breathing in potentially harmful particles during the replacement process.
By taking these safety precautions before replacing a belt on your Whirlpool dryer, you can minimize any potential risks and ensure a smooth and safe replacement process. Always prioritize safety when working with any household appliances to prevent accidents and injuries.
Step-by-Step Guide to Accessing the Belt on a Whirlpool Dryer
If you suspect that the belt on your Whirlpool dryer needs to be replaced, accessing the belt is the first step in the replacement process. Knowing how to access the belt will allow you to inspect it for any damage and proceed with removing and installing a new one. In this section, we will provide you with a step-by-step guide to accessing the belt on a Whirlpool dryer.
To begin, make sure to unplug your Whirlpool dryer from the power source before starting any maintenance or repair work. This is an important safety precaution that should always be taken when working on any appliance. Once the dryer is unplugged, you can then move on to accessing the belt.
The first step in accessing the belt on your Whirlpool dryer is to remove the dryer’s top panel. This can usually be done by removing a few screws located at the back of the top panel. After removing these screws, slide the panel towards the back of the dryer and lift it off to set it aside.
With the top panel removed, you will then need to remove the front panel of the dryer. This typically involves removing additional screws located near the top of the front panel and lifting it off of its clips or hinges. Once removed, carefully set aside the front panel.
After removing both panels, you should now have clear access to the drum and belt inside your Whirlpool dryer. You can then continue with inspecting and replacing the belt as needed. Taking these steps will allow you to properly access and replace a worn or damaged belt on your Whirlpool dryer so that it can continue running efficiently.
Removing the Old Belt and Inspecting for Any Additional Damage
Once you have accessed the dryer drum and motor pulley, it is time to remove the old belt from your Whirlpool dryer. Follow these steps to ensure a safe and effective removal process:
- Unplug the dryer: Before starting any work on your appliance, always unplug it from the power source to prevent any electrical accidents.
- Access the belt: Depending on the model of your Whirlpool dryer, you may need to remove the front or rear panel to access the belt. Refer to your user manual for specific instructions on how to do this for your particular model.
- Remove the old belt: Once you have located the old belt, carefully release it from the tension pulley and motor pulley. Slowly slide it off of the drum and set it aside.
After removing the old belt, take some time to inspect it for any signs of wear and tear. Look for fraying, cracking, or stretching that could indicate that it was in need of replacement. Additionally, check for any debris or buildup in the pulley system that may have contributed to the deterioration of the old belt.
Inspecting for additional damage is crucial as it can help prevent future issues with your Whirlpool dryer. If you notice any damage beyond just a worn-out belt, such as rusting or warping of components within your dryer, take note of these issues for further maintenance or potential repairs.
By thoroughly inspecting both the old belt and other components within your Whirlpool dryer, you can address any underlying issues that may have contributed to its deterioration and ensure a smooth replacement process.
Installing the New Belt Onto the Dryer Drum and Motor Pulley
Removing the Old Belt
To begin the process of installing a new belt on your Whirlpool dryer, you will first need to remove the old, worn-out belt. This can be done by accessing the dryer’s cabinet and locating the idler pulley assembly. Use a screwdriver to release the tension on the belt and then carefully lift it off of the drum and motor pulley.
Inspecting for Additional Damage
Once the old belt has been removed, take some time to inspect the drum and motor pulley for any signs of damage or wear. Look for any fraying or stretching on the old belt, as well as any debris that may have accumulated in these areas. It is important to address any additional issues before installing the new belt to ensure optimal performance.
Installing the New Belt
With the old belt removed and any potential damage addressed, you can now proceed with installing the new belt onto your Whirlpool dryer. Begin by placing the new belt around the drum, ensuring that it sits snugly in place. Next, loop the belt around the motor pulley and idler pulley assembly, making sure that it is properly aligned and positioned.
Aligning and Tensioning
After securing the new belt onto both pulleys, carefully rotate the drum by hand to ensure that the belt is aligned properly and not twisted. You will also need to adjust the tension on the idler pulley assembly to provide adequate tension on the new belt. This can be done by repositioning or adjusting any spring-loaded components as needed.
Reassembling and Testing
Once you are confident that everything is in place, reassemble your Whirlpool dryer’s cabinet and plug it back in. Test run your dryer without any clothes inside to ensure that everything is working properly. If there are no unusual noises or issues during this test run, you can consider your replacement process successful.
By following these step-by-step instructions for installing a new belt onto your Whirlpool dryer’s drum and motor pulley, you can enjoy extended use from your appliance with continued reliable performance.
Remember too: Safety always comes first when handling an electrical appliance. Always unplug your machine before attempting maintenance work.
Testing the Dryer to Ensure the New Belt Is Working Properly
After successfully installing the new belt onto your Whirlpool dryer, the final step is to test the appliance to ensure that the new belt is functioning properly. This step is crucial in ensuring that the dryer will continue to operate efficiently and effectively.
Testing the Drum Rotation
The first thing to do after replacing the belt on a Whirlpool dryer is to test the drum rotation. Close the dryer door and turn on the appliance. Once it’s running, listen for any unusual sounds such as squeaking or grinding, which could indicate an issue with the belt installation. Additionally, visually inspect the drum as it rotates to ensure that it is moving smoothly and without any hitches.
Checking Heat and Airflow
Another important aspect of testing a newly replaced dryer belt is checking for proper heat and airflow. Start a drying cycle with a load of laundry inside and monitor for adequate heat production. Also, pay attention to whether there is sufficient airflow coming from the exhaust vent. Any issues related to heat or airflow could indicate an underlying problem with the replacement process.
Ensuring Proper Functionality
In addition to testing drum rotation, heat, and airflow, it’s also essential to ensure that all other functions of the dryer are working properly. This includes checking if the timer and control buttons are functioning as they should, as well as monitoring for any error codes or malfunctions that may appear during operation.
Repeat Testing if Necessary
If any issues are identified during the initial testing phase, it may be necessary to repeat certain steps of the replacement process. This could involve re-installing the belt, checking for obstructions in the drum or motor pulley, or consulting with a professional if further troubleshooting is needed.
Overall, thorough testing of a Whirlpool dryer after replacing its belt is crucial in ensuring that it continues to operate at its best. By following these steps and carefully monitoring for any signs of malfunction, you can enjoy peace of mind knowing that your appliance is back in optimal working condition.
Troubleshooting Common Issues That May Arise During the Replacement Process
During the process of replacing a belt on a Whirlpool dryer, it is not uncommon to encounter some issues that may hinder the replacement process. Here are some common problems that you may face and troubleshooting tips to help overcome them:
1. Difficulty accessing the belt: One common issue that may arise is difficulty accessing the belt within the dryer. To troubleshoot this problem, double-check the user manual or online resources for your specific Whirlpool model to ensure you are following the correct steps for accessing the belt. Additionally, make sure to unplug the dryer from the power source before attempting to access any internal components for safety reasons.
2. Tension issues with the new belt: When installing the new belt onto the dryer drum and motor pulley, you may experience tension issues if not properly aligned. To troubleshoot this problem, carefully follow the instructions provided in the user manual or online resources for aligning and tensioning the belt correctly. It is crucial to ensure proper alignment to prevent any future issues with your dryer’s operation.

3. Motor pulley alignment: If you are having trouble attaching the new belt onto the motor pulley, it may be due to misalignment. Troubleshoot this issue by carefully inspecting and adjusting the motor pulley to ensure it is properly aligned with the new belt. Take caution when making adjustments and refer to your user manual for guidance.
4. Unusual noises or vibrations: After installing the new belt and testing the dryer, you may notice unusual noises or vibrations during operation. This can indicate an issue with either incorrect installation of the new belt or additional damage within the dryer system. Troubleshoot this problem by carefully re-inspecting your work and ensuring that all components are properly installed according to manufacturer guidelines.
5. Belt slipping off during operation: If you find that your newly installed belt is slipping off during operation, it may be due to misalignment or improper tensioning. Troubleshoot this issue by carefully re-aligning and properly tensioning the belt according to manufacturer guidelines for your specific Whirlpool model.
By being aware of these common issues and implementing troubleshooting techniques, you can overcome potential obstacles during the replacement process of a Whirlpool dryer belt. Remember to always prioritize safety and refer to reliable resources such as user manuals or online guides for accurate information specific to your appliance model.
Remember also that if users keep noticing similar problems recurring over time then professional advice should be taken from someone who has expertise on how best t fix troublesome belts in order to prolong their longevity at little cost.
Maintenance Tips to Prolong the Life of Your Whirlpool Dryer Belt
Maintaining your Whirlpool dryer belt is essential to ensure its longevity and avoid any unexpected issues or breakdowns. By following some simple maintenance tips, you can prolong the life of your dryer belt and keep your appliance running smoothly. Here are some helpful tips to consider:
Regular Cleaning
One of the most important maintenance tasks for your Whirlpool dryer belt is regular cleaning. Over time, lint, dirt, and debris can build up around the belt and pulleys, causing friction and wear. It’s important to regularly remove this buildup by using a vacuum or lint brush to clean around the drum and motor pulley.
Proper Use
Using your dryer properly can also help prolong the life of the belt. Avoid overloading the dryer with heavy items, as this can put extra strain on the belt and cause it to wear out faster. Additionally, make sure to use the appropriate heat settings for different types of fabrics to prevent overheating and unnecessary stress on the belt.
Inspect for Wear
Periodically inspecting your dryer belt for signs of wear or damage is crucial for catching any potential issues early on. Look for fraying, cracks, or any inconsistencies in the belt’s appearance. If you notice any damage, it’s important to replace the belt as soon as possible to prevent further problems.
Lubrication
Some Whirlpool dryers may have pulleys that require lubrication to reduce friction and extend the life of the belt. Check your dryer’s manual to see if this applies to your model and follow any recommended lubrication guidelines. Proper lubrication can help prevent premature wear and tear on the belt.
Professional Maintenance
If you’re unsure about how to perform maintenance tasks on your Whirlpool dryer or suspect there may be underlying issues with the belt or other components, it’s always best to seek professional assistance. A qualified technician can provide expert maintenance services and ensure that your dryer is in optimal working condition.
By following these maintenance tips, you can help maintain the integrity of your Whirlpool dryer belt and minimize the need for frequent replacements. Taking proactive steps to care for your appliance will not only extend its lifespan but also save you time and money in the long run.
Conclusion
In conclusion, replacing a belt on a Whirlpool dryer is a task that can significantly improve the efficiency and performance of your appliance. By ensuring that the dryer belt is functioning properly, you can avoid potential issues such as overheating, uneven drying, and excessive noise during operation.
As mentioned throughout this article, it is important to pay attention to signs that indicate the need for a belt replacement, gather the necessary tools and equipment, and take safety precautions before starting the replacement process.
Once you have successfully installed the new belt onto your Whirlpool dryer drum and motor pulley, it is crucial to test the dryer to ensure that the new belt is indeed functioning properly. This will give you peace of mind knowing that your appliance is back to operating at its best. Additionally, troubleshooting any common issues that may arise during the replacement process will help you address any potential challenges with confidence.
Furthermore, it is essential to remember that regular maintenance of your Whirlpool dryer belt can prolong its life and prevent future breakdowns. Simple tasks such as cleaning the lint trap regularly and avoiding overloading the dryer can go a long way in preserving the functionality of your appliance.
In summary, by taking the necessary steps to replace a worn-out or damaged belt on your Whirlpool dryer, you can enjoy the benefits of a properly functioning appliance. From faster drying times to reduced energy consumption, a new belt can make a noticeable difference in the overall performance of your dryer. Therefore, investing time in maintaining and replacing your dryer belt when needed will ultimately save you money and extend the lifespan of your Whirlpool dryer.