
Is your Whirlpool gas stove oven not working? It can be frustrating to encounter issues with your oven, especially when you rely on it for cooking meals. In this article, we will discuss the common issues that can arise with Whirlpool gas stove ovens and provide a step-by-step troubleshooting guide to help you identify and address the problem.
From a malfunctioning pilot light to problems with the gas supply or igniter, there are several potential reasons why your Whirlpool gas stove oven may not be functioning properly. We will cover each of these issues in detail and provide tips on how to troubleshoot and resolve them on your own.
By understanding the common issues that can affect Whirlpool gas stove ovens, you will be better equipped to diagnose and address any problems that may arise with your own appliance. Whether it’s a simple fix like relighting the pilot light or more complex maintenance tasks, this article will help guide you through the process of keeping your Whirlpool gas stove oven in good working condition.
Troubleshooting
If you are experiencing issues with your Whirlpool gas stove oven not working, troubleshooting the problem can help you identify the cause and potentially fix it yourself. Before calling for professional help, try these step-by-step troubleshooting tips to diagnose the issue with your gas stove oven.
Check for Power Supply
The first step in troubleshooting your Whirlpool gas stove oven is to ensure that it is receiving power. Check if the oven display is lighting up or if the control panel is responding when you press any buttons.
If there is no power supply to the oven, check the circuit breaker or fuse box to see if a circuit has been tripped or a fuse has blown. Resetting the circuit breaker or replacing a blown fuse may restore power to your gas stove oven.
Inspect Gas Supply
If your Whirlpool gas stove oven is receiving power but still not working, the next step is to check the gas supply. Make sure that the shutoff valve for the gas line connected to the oven is fully open.
You can also test other gas appliances in your home, such as a gas range or water heater, to see if they are functioning properly. If other gas appliances are working and there seems to be no issue with the gas supply, move on to checking other potential causes of the problem.
Test Oven Functionality
After confirming that both power and gas supply are not causing the issue with your Whirlpool gas stove oven, it’s time to test its functionality. Turn on the oven and observe if there are any unusual sounds, smells, or error messages displayed on the control panel.
Additionally, try setting different temperatures and cooking modes to see if any specific function of the oven is not working as intended. This can provide valuable information for further troubleshooting or when seeking professional help.
By following these troubleshooting steps, you can begin identifying and understanding what might be causing your Whirlpool gas stove oven not working properly. It’s important to approach each step carefully and safely before attempting any repairs on your own. If these steps do not resolve the issue with your gas stove oven, it may be time to call a professional for repairs.
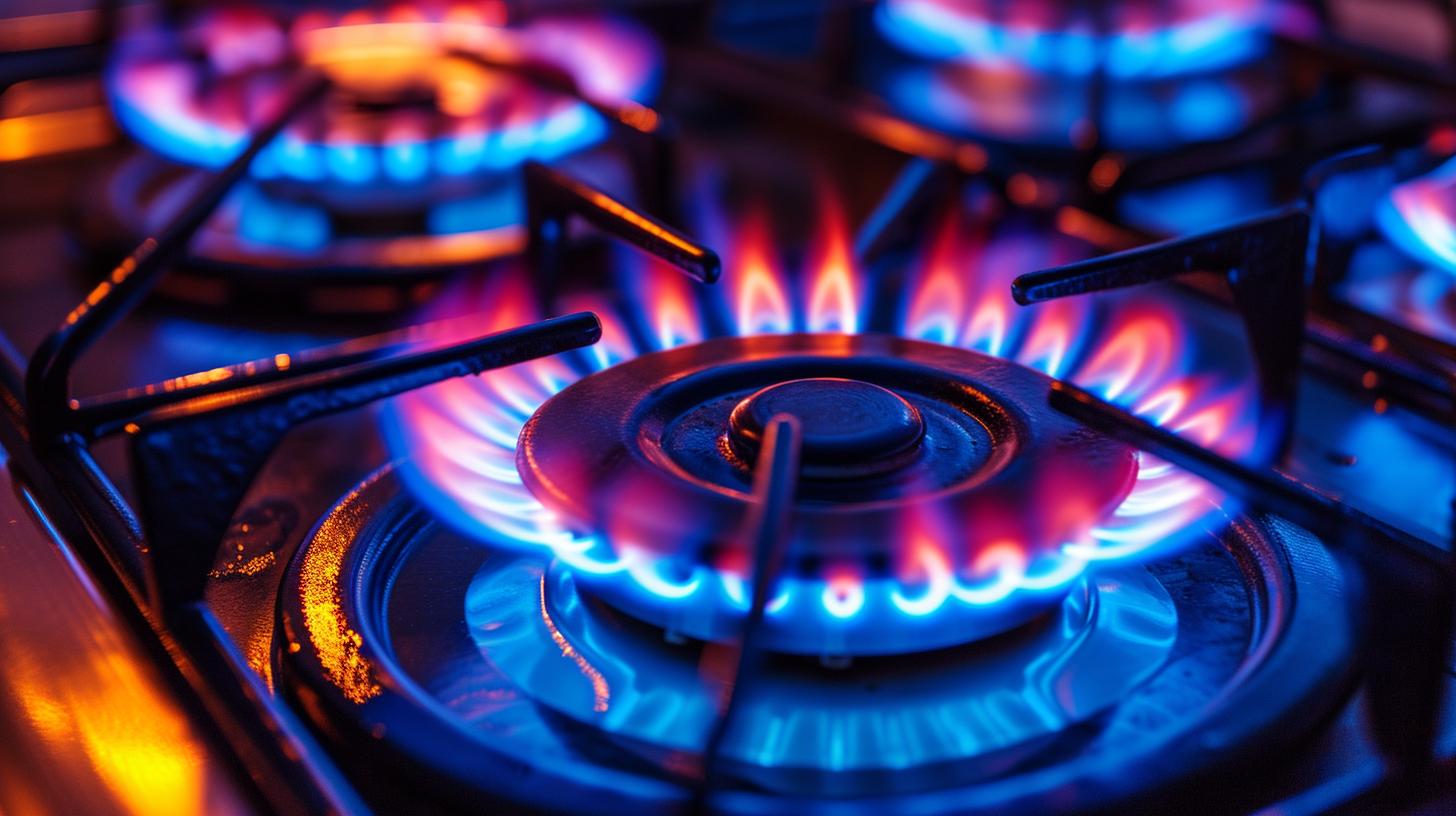
Pilot Light
The pilot light is an essential component of a gas stove oven, including those made by Whirlpool. If your Whirlpool gas stove oven is not working, the pilot light may be one of the first things you should check. The pilot light is responsible for igniting the gas to create the flame that heats the oven. If the pilot light goes out or is not burning properly, it can lead to your oven not working at all.
To check if the pilot light on your Whirlpool gas stove oven is working, start by locating the access panel at the bottom of the oven. Depending on the model, you may need to remove a cover or use a flashlight to see inside. Once you have located the pilot light, observe whether it is lit and burning steadily.
If it is not lit, follow your oven’s user manual instructions on how to relight it. Usually, this involves turning off the gas supply, waiting for any residual gas to dissipate, and then using a match or lighter to reignite the pilot light.
If you have successfully relit the pilot light but notice that it continues to go out frequently, there may be an underlying issue with your oven that requires professional attention. It’s important to never ignore a consistently extinguishing pilot light as this could indicate a problem with gas flow or ventilation in your appliance.
| Issue | Solution |
|---|---|
| Pilot Light Not Lit | Follow user manual instructions to relight pilot light |
| Pilot Light Goes Out Frequently | Seek professional help for potential issues with gas flow or ventilation |
Gas Supply
Check Gas Line
Start by checking the gas line that supplies fuel to your oven. Make sure that the valve is fully open and that there are no visible signs of damage or leaks along the line. If you notice any issues with the gas line, it is essential to address them immediately for safety reasons.
Test Gas Pressure
Another important step in ensuring the proper functioning of your Whirlpool gas stove oven is to test the gas pressure. Low gas pressure can result in insufficient heat in the oven, while high pressure can cause damage to internal components. Use a pressure gauge to measure the gas pressure at the connection point for the oven and compare it with the recommended pressure in your owner’s manual.
Clean Gas Burners
Over time, gas burners can become clogged with debris and food particles, leading to uneven heating or complete failure of the burner. Regularly cleaning your gas burners can help ensure a steady and consistent flow of gas to your Whirlpool gas stove oven. Remove the burners and clean them thoroughly with a wire brush or compressed air to remove any obstructions.
By taking these steps to ensure that the gas supply to your Whirlpool gas stove oven is functioning properly, you can troubleshoot and potentially resolve issues with your oven not working as expected. If you have checked all these aspects and are still experiencing problems with your stove’s performance please seek professional help for further assistance.
Igniter
Is your Whirlpool gas stove oven not working properly? One common issue that could be causing this problem is a faulty igniter. The igniter is responsible for lighting the gas in the oven, and if it is not functioning correctly, the oven may fail to heat up. In this section, we will discuss how to test and replace the igniter on a Whirlpool gas stove oven.
First, it’s essential to make sure that the gas supply to the oven is turned off before attempting any troubleshooting or repair work. Once you have ensured the gas supply is off, you can access the igniter by removing the bottom panel of the oven. The igniter is typically located near the rear of the oven and is connected to both the electrical system and gas line.
To test the igniter, you can use a multimeter to check for continuity. If there is no continuity, it indicates that the igniter needs to be replaced. It’s important to note that even if the igniter does have continuity, it may still be faulty and require replacement if it is not glowing hot enough to ignite the gas.
If you determine that the igniter needs to be replaced, you can order a new one from a reputable appliance parts supplier. When replacing the igniter, make sure to follow manufacturer instructions and disconnect power to the oven before beginning any work. By following these steps, you should be able to troubleshoot and replace the faulty igniter on your Whirlpool gas stove oven, restoring its functionality.
Temperature Sensor
If your Whirlpool gas stove oven is not working properly, one common issue to troubleshoot is the temperature sensor. The temperature sensor plays a crucial role in ensuring that the oven reaches and maintains the set temperature for even and consistent cooking. If you suspect that the temperature sensor is causing the problem, follow these steps to test and potentially replace it:
Step-by-Step Guide to Testing and Replacing the Temperature Sensor:
1. Disconnect Power: Before performing any maintenance on your oven, always disconnect power to the appliance to prevent electrical shock.
2. Locate the Sensor: The temperature sensor is usually located at the back of the oven near the top. Consult your owner’s manual for specific instructions on accessing and removing the sensor.
3. Testing: Once you have located the temperature sensor, use a multimeter to test its resistance. A functioning sensor should show a specific resistance level within a certain range. Refer to your owner’s manual for the correct resistance levels for your model.
4. Replacement: If the temperature sensor fails the resistance test, it will need to be replaced. You can purchase a replacement sensor from an authorized Whirlpool parts distributor or directly from the manufacturer.
By following these steps, you can determine if a faulty temperature sensor is causing your Whirlpool gas stove oven not working properly.
Remember that proper maintenance of your oven, including regular cleaning and inspections, can help prevent issues with components such as the temperature sensor. However, if you are uncomfortable testing or replacing parts yourself, it’s best to call a professional technician familiar with Whirlpool appliances to ensure that all repairs are done correctly and safely.
By understanding how to test and replace the temperature sensor in your Whirlpool gas stove oven, you can potentially resolve issues with its functionality without having to call for professional help immediately.
Gas Valve
If you are experiencing issues with your Whirlpool gas stove oven not working, one of the potential culprits could be a problem with the gas valve. The gas valve is responsible for controlling the flow of gas to the oven burner, so any malfunction can result in the oven not heating up properly or at all. Here’s a step-by-step guide to troubleshooting and repairing issues with the gas valve on your oven:
1. Check for Gas Flow: First, ensure that there is a steady flow of gas to the oven. You can do this by turning on another gas appliance in your home, such as a stovetop burner, to see if it is receiving gas. If not, there may be an issue with the gas supply to your home and you should contact your utility provider.
2. Inspect the Gas Valve: Carefully inspect the gas valve for any signs of damage, corrosion, or debris buildup. If there are visible issues, you may need to clean or replace the valve.
3. Test the Gas Valve: Using a multimeter, test the continuity of the gas valve to determine if it is functioning properly. If there is no continuity, it may be necessary to replace the valve.
4. Replace the Gas Valve: If all else fails and you suspect that the gas valve is indeed causing the issue with your Whirlpool gas stove oven not working, it may be time to replace the valve altogether. Be sure to consult your appliance manual or seek professional assistance for this task.
By following these troubleshooting steps, you can effectively identify and address any issues with the gas valve on your Whirlpool gas stove oven and get it back up and running in no time.
Maintenance Tips
Regular maintenance is key to keeping your Whirlpool gas stove oven in good working condition. One of the most common issues that can arise with these ovens is the pilot light going out. It is important to regularly check and relight the pilot light to ensure that your oven continues to function properly. Additionally, make sure to clean the area around the pilot light regularly to prevent any blockages or build-up that could affect its performance.
Another important aspect of preventative maintenance for your Whirlpool gas stove oven is ensuring that the gas supply is functioning properly. Check for any leaks or interruptions in the gas supply to your oven, and address any issues immediately to avoid further problems.
In addition, it’s crucial to test and replace the igniter on a regular basis as part of your preventative maintenance routine. The igniter plays a vital role in starting the combustion process in your oven, so keeping it in good condition is essential for its proper functioning. Regular testing and replacement of the igniter can help prevent issues with your Whirlpool gas stove oven not working properly.
By following these maintenance tips and staying proactive in caring for your Whirlpool gas stove oven, you can help prevent common issues and keep your appliance in good working condition. However, if you do encounter any problems despite regular maintenance, it may be time to call a professional for repairs to ensure that your oven continues to operate safely and efficiently.
Calling for Professional Help
In conclusion, when all troubleshooting and maintenance efforts fail to resolve the issue of your Whirlpool gas stove oven not working, it may be time to call for professional help. If you have tried relighting the pilot light, checking the gas supply, testing and replacing the igniter and temperature sensor, and troubleshooting the gas valve with no success, then it is best to leave the repairs to a qualified technician.
Attempting to fix complex issues without proper knowledge and experience can result in further damage to your appliance.
Professional technicians have the expertise and training to accurately diagnose and repair any underlying problems with your Whirlpool gas stove oven. They can safely troubleshoot issues related to electrical components, gas leaks, and mechanical malfunctions. Additionally, seeking professional help ensures that the repairs are done correctly, preventing potential safety hazards or voiding the warranty on your appliance.
Ultimately, knowing when to call for professional help is crucial in maintaining the functionality of your Whirlpool gas stove oven. By recognizing the limitations of DIY repairs and seeking expert assistance when needed, you can ensure that your appliance operates efficiently and safely for years to come.
If you find that your oven is still not working despite all efforts outlined in this article, do not hesitate to contact a reputable repair service for assistance with diagnosing and fixing the problem.