
Are you unsure of how to use your Whirlpool washer? In this article, we will provide you with a comprehensive guide on how to effectively use your Whirlpool washer for optimal laundry results. From understanding the controls and display to troubleshooting common issues, we’ve got you covered. Whether you are a new owner of a Whirlpool washer or simply looking to enhance your laundry routine, this guide will help you get the most out of your appliance.
When it comes to understanding the controls and display of your Whirlpool washer, it is important to familiarize yourself with the different settings and options available. Knowing how to navigate the control panel and interpret the display will ensure that you can easily select the appropriate wash cycle and additional options for your specific laundry needs.
Once you have mastered the controls and display, it’s time to prepare your laundry for washing. Sorting your laundry according to color, fabric type, and level of soiling will help optimize the washing process. Additionally, using the right amount of detergent for your load is essential for achieving clean and fresh-smelling clothes without any residue.
Selecting the appropriate wash cycle for your laundry is another crucial step in using your Whirlpool washer effectively. With various wash cycles such as normal, delicate, heavy duty, and quick wash, understanding which cycle suits different types of loads will ensure that your clothes are cleaned thoroughly without being subjected to unnecessary wear and tear.
Furthermore, we will cover how to load your laundry into the washer drum properly, start and pause a wash cycle, make adjustments mid-cycle if necessary, remove and care for your clean laundry once the cycle is complete, troubleshoot common issues that may arise with your Whirlpool washer, as well as provide maintenance and cleaning tips to keep it in top condition.
Stay tuned as we take you through each step in detail on how to use your Whirlpool washer efficiently for exceptional laundry results.
Preparing Your Laundry for Washing
When it comes to preparing your laundry for washing in a Whirlpool washer, there are a few key steps to follow to ensure that your clothes come out clean and fresh every time. Before even getting started with the washer, it’s important to properly sort and prepare your laundry.
First and foremost, it’s crucial to check the care labels on your garments to ensure that you’re washing them according to their specific instructions. This will help prevent any potential damage or shrinking of your clothes during the wash cycle. Additionally, be sure to empty all pockets and remove any accessories or belts from clothing items.
Once you’ve sorted through your laundry and checked the care labels, it’s time to pre-treat any stains or heavily soiled areas on your garments. This can be done by applying a small amount of detergent or stain remover directly onto the affected area and gently rubbing it in before placing the item in the washer.
It’s also important to make sure that you’re not overloading the washer with too many items. Overloading can prevent your clothes from being thoroughly cleaned and may even cause damage to the washer itself. On the flip side, washing too small of a load can also be inefficient, so it’s important to find a balance.
Finally, before loading your laundry into the washer drum, double check that all zippers are zipped up, hooks are fastened, and there are no tangles or twists in your garments. Taking these preparatory steps will help ensure that your laundry comes out fresh, clean, and undamaged after going through a wash cycle in your Whirlpool washer.
Sorting Your Laundry for Optimal Washing
Separating by Color and Fabric
One of the key steps in preparing your laundry for washing is sorting it according to color and fabric type. This helps to ensure that your clothes are not damaged or discolored during the washing process. Separating light, dark, and bright colors will prevent color bleeding, while separating delicate fabrics from sturdier ones prevents damage.
Separating by Soil Level
Another important factor to consider when sorting your laundry is the level of soil or dirt on each item. Clothes with heavy soil, such as work uniforms or gardening clothes, should be washed separately from lightly soiled items. This ensures that heavily soiled clothes can be properly cleaned without transferring dirt to other items.
Separating by Water Temperature and Wash Cycle
Sorting your laundry based on the recommended water temperature and wash cycle for each item can help optimize the cleaning process. For example, items that require cold water and a gentle cycle should be separated from those that need hot water and a more intense wash cycle. This ensures that each item receives the appropriate treatment for optimal results.
By taking the time to sort your laundry properly before loading it into your Whirlpool washer, you can maximize the effectiveness of the wash cycle and keep your clothes looking their best. The next step after sorting is choosing the right amount of detergent for your load and selecting the appropriate wash cycle on your washer.
Using the Right Amount of Detergent for Your Load
When using a Whirlpool washer, it is important to use the right amount of detergent for your load to ensure clean and fresh-smelling laundry. Using too much detergent can result in soap residue on your clothes, while using too little may not effectively clean your laundry. Follow these steps to determine the right amount of detergent to use for each load:
1. Read the manufacturer’s instructions: Before you start using your Whirlpool washer, it is important to read the manufacturer’s instructions that came with the appliance. This will provide valuable information on the recommended amount of detergent based on load size and type of laundry.
2. Use measuring tools: To avoid guessing or eyeballing the amount of detergent needed for each load, use a measuring cup or dosing ball to accurately measure out the correct amount. This will ensure that you are not overusing or underusing detergent.
3. Consider load size and soil level: For a small load with light soil, you will need less detergent compared to a large load with heavy soil. Take into account the size of your load and the level of dirt or stains when measuring out detergent.
4. Follow detergent guidelines: Different detergents have different concentration levels, so be sure to follow the guidelines provided on the packaging for the specific brand and type of detergent you are using.
5. Avoid using too much fabric softener: While fabric softener can help make laundry feel softer and smell better, using too much can leave behind a sticky residue on clothes and in your washer. Use an appropriate amount as recommended by the fabric softener manufacturer.
By following these steps, you can ensure that you are using the right amount of detergent for your Whirlpool washer, resulting in clean and fresh-smelling laundry every time.
Remember that overusing detergent can lead to excess suds and strain on your machine, while underusing may not effectively clean your clothes. It’s important to find a balance by understanding your machine’s capacity as well as how soiled your laundry typically gets. Don’t forget to regularly clean your washing machine including dispensers.
Selecting the Appropriate Wash Cycle for Your Laundry
When using your Whirlpool washer, it is important to select the appropriate wash cycle for your laundry to ensure that it is cleaned effectively and without damage. Here are some tips on how to choose the right wash cycle for different types of laundry:
- Normal Cycle: This is the most commonly used cycle for regular, sturdy fabrics such as cotton, linen, and durable synthetics. It provides a thorough wash without being too harsh on the clothes.
- Delicate Cycle: Use this cycle for delicate fabrics such as silk, lace, and sheer materials. The gentle agitation and slower spin speed will help protect these items from damage.
- Heavy Duty Cycle: For heavily soiled items like work clothes or sports uniforms, the heavy duty cycle provides a longer wash time with extra agitation to remove deep stains.
- Quick Wash Cycle: When you need to freshen up lightly soiled items in a hurry, the quick wash cycle is a great option. It’s also ideal for smaller loads that don’t require a full wash cycle.
In addition to these basic cycles, many Whirlpool washers also offer specialty cycles such as “Whites,” “Bedding,” “Towels,” “Jeans,” and “Hand Wash.” These cycles are specifically designed to provide optimal washing conditions for these specific types of laundry.
It is important to read the manufacturer’s instructions for each specific wash cycle on your Whirlpool washer. This will ensure that you understand the recommended load size, water temperature, spin speed, and other settings associated with each cycle.
Finally, keep in mind that newer models of Whirlpool washers may come equipped with smart features that can automatically select the appropriate wash cycle based on the type of load detected. However, it is still beneficial to know how to manually select the right cycle in case you need to make adjustments or override the automatic selection.
By understanding how to select the appropriate wash cycle for your laundry, you can improve cleaning efficiency and extend the longevity of your clothes. With the right cycle selected, you can have peace of mind knowing that your laundry is being washed in a way that best suits its fabric composition and level of soiling.
Understanding the Additional Wash Options on Your Whirlpool Washer
In addition to selecting the appropriate wash cycle for your laundry, your Whirlpool washer may have additional wash options to further customize your washing experience. These options allow you to tailor the wash to specific fabric types, soil levels, and more. Understanding how to use these additional wash options can help you achieve the best results for your laundry.
One common additional wash option on a Whirlpool washer is the pre-soak feature. This option is especially useful for heavily soiled items or for treating stained clothing before starting the regular wash cycle. To use the pre-soak feature, simply add detergent and any stain-treating products to the drum, select the pre-soak option on your washer’s control panel, and then start the cycle. This will give your laundry an extra soak before the main wash begins.
Another useful wash option that is often available is the extra rinse feature. This allows you to add an additional rinse cycle at the end of a regular wash cycle. The extra rinse can be beneficial for those with sensitive skin or allergies as it helps ensure that all traces of detergent are thoroughly removed from your laundry.
Some Whirlpool washer models may also offer a steam or sanitize option. The steam option uses steam during certain cycles to help relax wrinkles and remove odors from clothing, while the sanitize option provides extra hot water and extended wash time to kill germs and bacteria on heavily soiled items.
It’s important to consult your Whirlpool washer’s user manual to understand all of the available wash options and how to properly utilize them for optimal results. Experimenting with these additional wash options over time will help you determine which ones work best for different types of laundry loads.
By understanding and utilizing these additional wash options on your Whirlpool washer, you can ensure that your clothes come out clean, fresh, and properly cared for after each washing cycle.
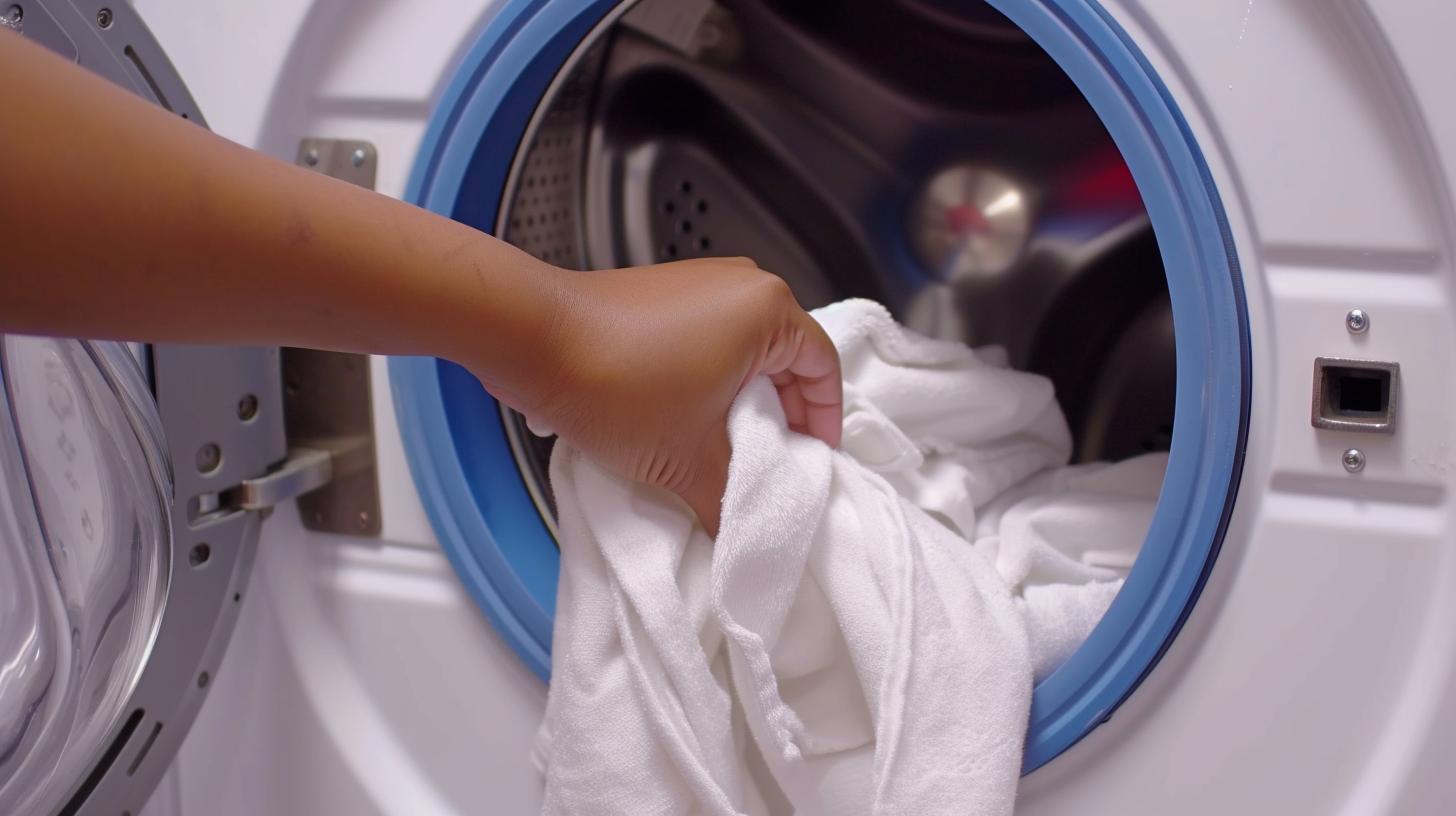
Loading Your Laundry Into the Washer Drum
When it comes to using your Whirlpool washer, properly loading your laundry into the washer drum is crucial for a successful wash cycle. Follow these steps to ensure that your laundry is loaded correctly:
- Open the washer lid or door and make sure the drum is empty before adding your laundry. This will prevent any items from getting stuck or tangled during the wash cycle.
- Check the manufacturer’s instructions for the maximum load capacity of your specific Whirlpool washer model. Overloading the drum can lead to poor washing results and potential damage to the machine.
- Separate your laundry into similar fabric types and colors to avoid any color bleeding or damage to delicate garments. Use separate loads for whites, darks, and colors.
- Turn any clothes with zippers, buttons, or hooks inside out before placing them in the washer drum. This will help prevent snagging on other clothing items during the wash cycle.
- Place large items like bed linens and towels loosely around the perimeter of the washer drum, allowing space in the center for smaller items like shirts and undergarments.
- Add detergent to the dispenser drawer according to the manufacturer’s recommended amount for your specific load size and soil level.
By following these simple steps, you can ensure that your laundry is loaded efficiently and ready for a successful washing experience with your Whirlpool washer how to use.
Starting and Pausing a Wash Cycle
Once you have sorted your laundry, selected the appropriate wash cycle and added the right amount of detergent to your Whirlpool washer, it’s time to start the wash cycle. If you need to make any adjustments before starting, now is the time to do so. Here’s how to start and pause a wash cycle on your Whirlpool washer:
Starting the Wash Cycle
To start the wash cycle, simply press the Power button on your Whirlpool washer. Once the power is on, select your desired wash cycle using the control panel or dial. Some models may have a Start button that needs to be pressed after selecting the cycle.
Pausing the Wash Cycle
If you need to pause the wash cycle for any reason, such as adding a forgotten item of clothing, simply press the Pause/Cancel button on your Whirlpool washer. This will temporarily stop the machine from running. Keep in mind that some models may take a few moments to pause after pressing this button.
Resuming a Paused Wash Cycle
To resume a paused wash cycle, simply close the door of your Whirlpool washer (if it was opened) and press the Start button again. The machine will continue from where it left off in the wash cycle.
Choosing Delayed Start
Some models of Whirlpool washers may also have an option for delayed start. This allows you to set a time for when you want the wash cycle to begin. To use this feature, select your desired cycle and then use the controls to set a delay time before pressing Start.
Remember that while many Whirlpool models operate similarly, there may be slight differences in controls and features depending on your specific washer model. Always refer to your user manual for detailed instructions on starting and pausing a wash cycle with your particular Whirlpool washer model.
By following these simple steps, you can easily navigate through starting and pausing a wash cycle with your Whirlpool washer how to use guide at hand whenever necessary.
Making Adjustments to the Wash Cycle Mid-Cycle
Pause Button Functionality
The pause button on your Whirlpool washer serves as a useful feature when you need to make adjustments to the wash cycle mid-cycle. If you need to add an item that you initially forgot, simply press the pause button. The washer will stop, allowing you to open the door and add the forgotten item. Close the door and press start again to resume the cycle.
Changing Wash Options
If you realize mid-cycle that you need to change or add an additional wash option, such as pre-soak or extra rinse, most Whirlpool washers allow you to do so. Press the options button on the control panel and select the desired option. Keep in mind that some options may only be available at certain points in the cycle, so it’s important to refer to your washer’s user manual for specific instructions.
Adjusting Spin Speed
In some cases, you may find that you need to adjust the spin speed during the wash cycle. Whether it’s because of a particularly delicate item or a heavily soiled load, being able to modify the spin speed can make a significant difference in preserving your laundry. Most Whirlpool washers have this functionality built into their control panels, giving you the flexibility to customize your wash cycle according to your specific needs.
Adding More Detergent
If you feel that you underestimated the amount of detergent needed for your load or if something unexpected occurs during the wash cycle, such as a spill or stain that requires additional cleaning power, many models of Whirlpool washers allow you to add more detergent mid-way through the cycle. Simply pause the machine, open the detergent dispenser drawer and add more detergent as needed before resuming the cycle.
Finalizing Adjustments
After making any necessary adjustments mid-cycle, it is important to ensure that all changes have been properly implemented before allowing the washer to continue its process. Double-check settings and added items diligently before closing the door and resuming your Wash Cycle on your Whirlpool Washer How To Use this knowledge effectively for future loads.

Remember that while modern Whirlpool washing machines are equipped with numerous features designed to facilitate efficient cleaning and care for your laundry, it is essential always yo refer back n rely on manufacturer’s istruvtions youto avoid any potential damage ot issues with our machine themisce;f.
Removing and Caring for Your Clean Laundry
Once your Whirlpool washer has completed the selected wash cycle, it’s time to remove your clean laundry and properly care for it. Here are some tips on how to effectively handle your freshly-washed clothes.
First, you will need to open the washer door or lid in order to access your laundry. Be careful when handling wet clothing as they may be heavier than normal. Remove the items from the drum and shake them out gently to separate any clumped together items.
Once all of the items have been removed from the washer, check for any remaining detergent residue. If you notice any lingering soap, you may want to consider running an additional rinse cycle to ensure all of the detergent has been properly rinsed away.
Next, it’s time to transfer your clean laundry from the washer to the dryer or clothesline. Before doing so, be sure to check for any delicate or handwash items that should not be put in the dryer. These items should be set aside and air-dried separately.
If using a dryer, make sure to load it evenly with a variety of different types of fabric (i.e. towels with t-shirts) in order to promote efficient drying and reduce wrinkles. It is also important to regularly clean your dryer’s lint trap in between loads.
Finally, once your laundry is completely dry, promptly fold or hang up each item in order to prevent wrinkles and maintain their cleanliness. If necessary, iron any wrinkled pieces before storing them away.
By following these steps for removing and caring for your clean laundry after using your Whirlpool washer, you can ensure that your clothes remain fresh, clean, and well-maintained for future use.
Troubleshooting Common Issues With Your Whirlpool Washer
Owning a Whirlpool washer can make doing laundry a breeze, but like any appliance, it may experience some issues from time to time. Knowing how to troubleshoot these common problems can save you time and money in the long run. Here are some of the most frequent issues that may arise with your Whirlpool washer and how to address them.
One common issue that Whirlpool washer owners may encounter is a leaky machine. If you notice water leaking from your washer, first check the hoses for any visible cracks or damage. Tighten any loose connections and replace any damaged hoses as needed. Additionally, inspect the door seal for any tears or wear and tear, as this could also be the source of the leak.
Another issue that often arises is a washer that won’t start. If you press the start button and nothing happens, first check if the washer is properly plugged into an electrical outlet.
Ensure that the circuit breaker hasn’t tripped and that there are no issues with the power supply to your home. If all seems to be in order, it may be a problem with the control board or door lock assembly, in which case it’s best to contact a professional for further assistance.
Some users may also encounter an error code displayed on their Whirlpool washers’ control panel. These error codes can indicate various issues such as a clogged drain, unbalanced load, or malfunctioning components. Refer to your owner’s manual for a list of error codes specific to your model and follow the recommended troubleshooting steps. In many cases, simply resetting the machine can resolve minor errors.
If you observe loud or unusual noises coming from your Whirlpool washer during operation, it may be due to an unbalanced load or foreign objects caught in the drum or pump. Stop the cycle and redistribute the laundry evenly inside the drum before restarting the machine. Inspect inside the drum and pump for any objects such as coins or small articles of clothing that may be causing noise or obstruction.
Knowing how to troubleshoot these common issues with your Whirlpool washer can help keep your appliance running smoothly for years to come. Always refer to your owner’s manual for specific instructions related to your model and consider contacting a professional technician if you encounter persistent problems with your machine.
Maintenance and Cleaning Tips to Keep Your Whirlpool Washer in Top Condition
In conclusion, now that you have a better understanding of how to use your Whirlpool washer, it’s important to also know how to keep it in top condition. Regular maintenance and cleaning will not only prolong the life of your washer but also ensure that your laundry comes out clean and fresh every time.
To start with maintenance, it is essential to clean the inside of the drum and the detergent dispenser regularly. This can be done by running a hot water wash cycle with a washing machine cleaner or a mixture of vinegar and baking soda. Additionally, wiping down the door seal and glass after each use can prevent mold and mildew buildup.
It is also important to check for any debris or residue in the filter located near the bottom front of the washer. This should be done at least once a month, especially if you notice any issues with draining or an unpleasant odor coming from your washer.
Another vital maintenance tip is to periodically inspect the hoses and connections for any leaks or damage. Ensuring that these are in good condition can help prevent water damage to your home and extend the life of your washer.
Finally, staying on top of regular maintenance tasks such as leveling the washer, checking for any unusual noises during operation, and following the manufacturer’s guidelines for power usage can all contribute to keeping your Whirlpool washer in top condition for years to come.
By following these maintenance and cleaning tips, you can keep your Whirlpool washer running smoothly and efficiently while also enjoying clean laundry with each use. Remember that proper care and maintenance will not only save you time and money in the long run but also ensure that your clothes are always washed effectively.